

Imagine this: You’re finishing up the perfect email to a prospective client, and you’ve proofread the copy approximately 15 times. It looks good, so you hit send. It’s only then that you realize you forgot to include a proper email signature — which can be the most important part of an email.
Sound familiar? You can avoid snafus like the one described above by creating an official signature through the HubSpot Email Signature Template Generator tool. Our guide below provides the step-by-step instructions you need to set up your new, custom email signature.
Why Your Email Signature Matters
Before we walk you through creating a proper email signature, let’s review why having one is so essential.
First off, a professional email signature isn’t just your name. Think of your email signature as a digital business card — it should include your company name, contact info and business logo. Not only will this make it easier for your clients to get in touch with you, but it’ll also help you build brand awareness while making your emails look polished and legitimate.
Legitimacy is the other key part. A personalized signature creates trust between you and the recipient, reassuring them that they are speaking with a real person and not just a bot. That way, they’re more likely to both read and respond to your emails, driving engagement.
Elements of a Strong Email Signature
A professional email signature can help you connect with more prospective customers. But to create a compelling signature, you need to include more than just your basic contact information. Elements of a strong email signature include:
- Consistent branding: Make sure your email signature style aligns with your brand’s colors and fonts. You’ll also want to include your company logo, which should be consistent across all marketing materials, including your website, business card and letterhead.
- Relevant links: Include a link to your company’s website and any other relevant links in your email signature. The easier you make it for people to connect with your business, the better.
- Social media icons: Add your business’s social icons to your signature to encourage clients to check out your brand’s platforms. Doing this can also help your brand gain more followers.
- Legal disclaimers: Depending on your industry, you may need to provide disclaimers regarding confidentiality and copyrights. By placing this disclaimer in the email signature, you’ll know it’s incorporated into every email you send, which can help ease legal concerns for both you and your clients.
Reasons to Use the HubSpot Email Signature Generator
We’re big fans of the HubSpot Signature Generator because it makes creating a professional email signature easy-peasy. Instead of trying to configure your own, HubSpot has a variety of templates to choose from, allowing you to create a personalized signature within minutes.
With this email signature generator, you can:
With this email signature generator, you can:
- Elevate email signature marketing efforts: Drop a link to your latest marketing campaign and include a dazzling banner to get your readers to click.
- Boost your social media followers: Add icons with social links to your various platforms so your readers can stay connected.
- Show some personality: Include a profile picture and other eye-catching design elements to leave readers with a lasting impression.
Improving your signature is one of the easiest ways to take your corporate and marketing emails to the next level. Oh, and the best part about this software? It’s 100% free! That’s right — anyone on the internet can use this free email signature generator, and you don’t even need to create a HubSpot account.
Subscribe to
The Content Marketer
Get weekly insights, advice and opinions about all things digital marketing.
Thank you for subscribing to The Content Marketer!
How to Use the HubSpot Signature Generator
So now that you know about all of the benefits that the HubSpot email signature template generator can provide, it’s time to set up your own customized signature:
1. Choose Your Signature Template
First things first, choose your email signature template from HubSpot’s pre-made templates. There are 6 different ones to pick from, so take your time selecting the one that best fits your needs.
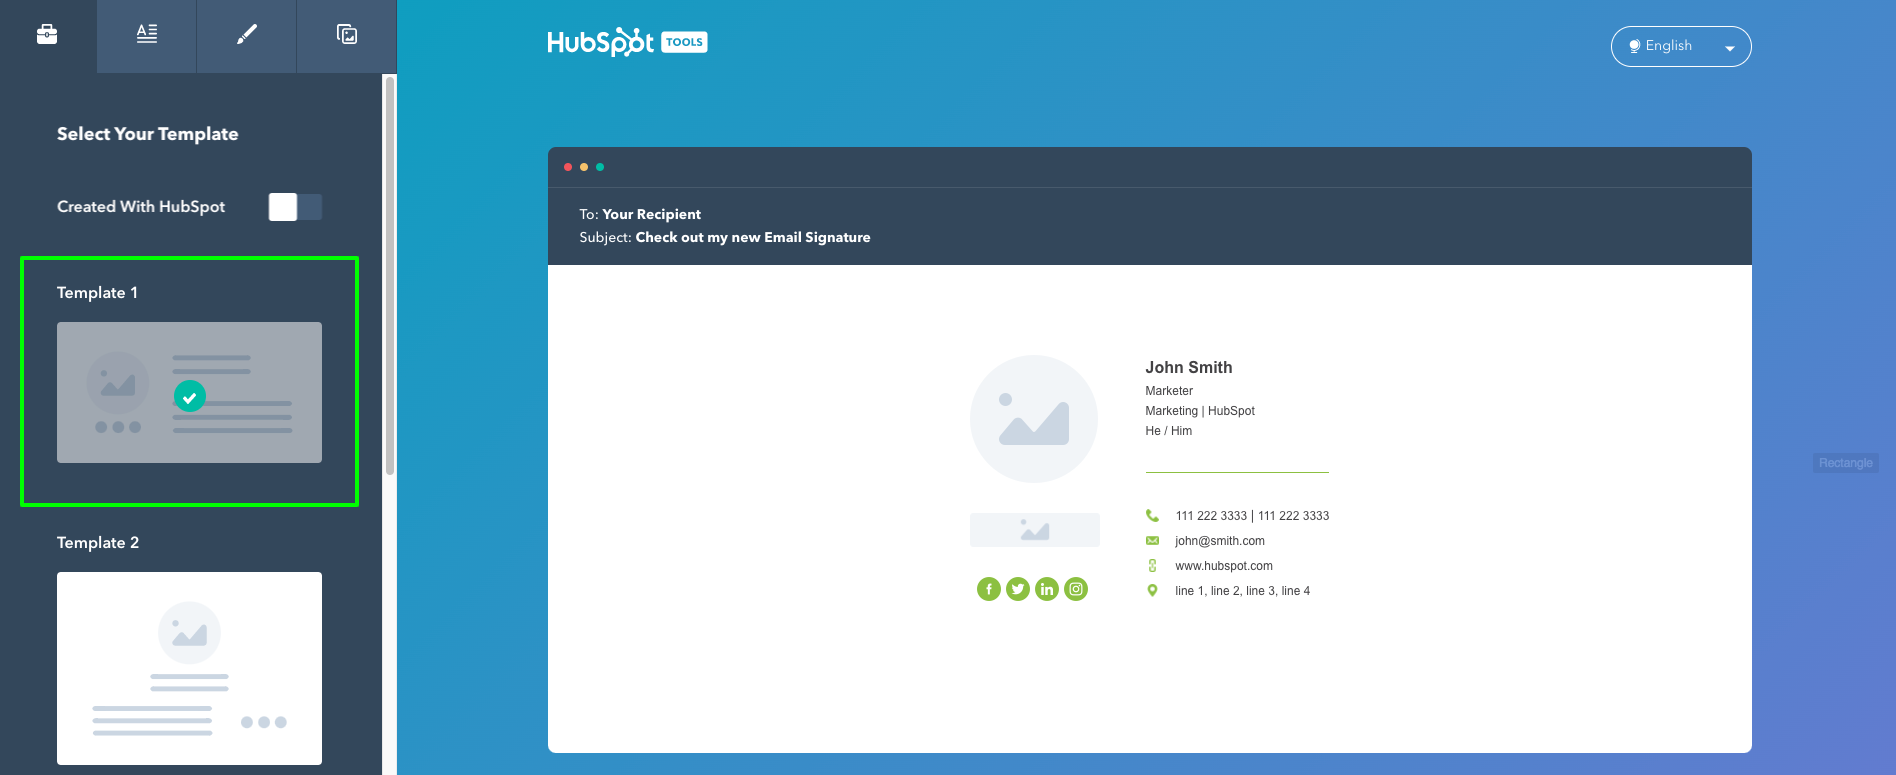
Once you choose a template, you can make alterations. To do so, click the paintbrush icon in the generator. You’ll be able to change the text, fonts and colors. This way, you can select styles that are cohesive with your branding.
2. Enter Your Contact Information
Once you’ve selected your template, it’s time to personalize it with your contact information. You’ll want to provide your first and last name as well as the name of your current role, department or company.
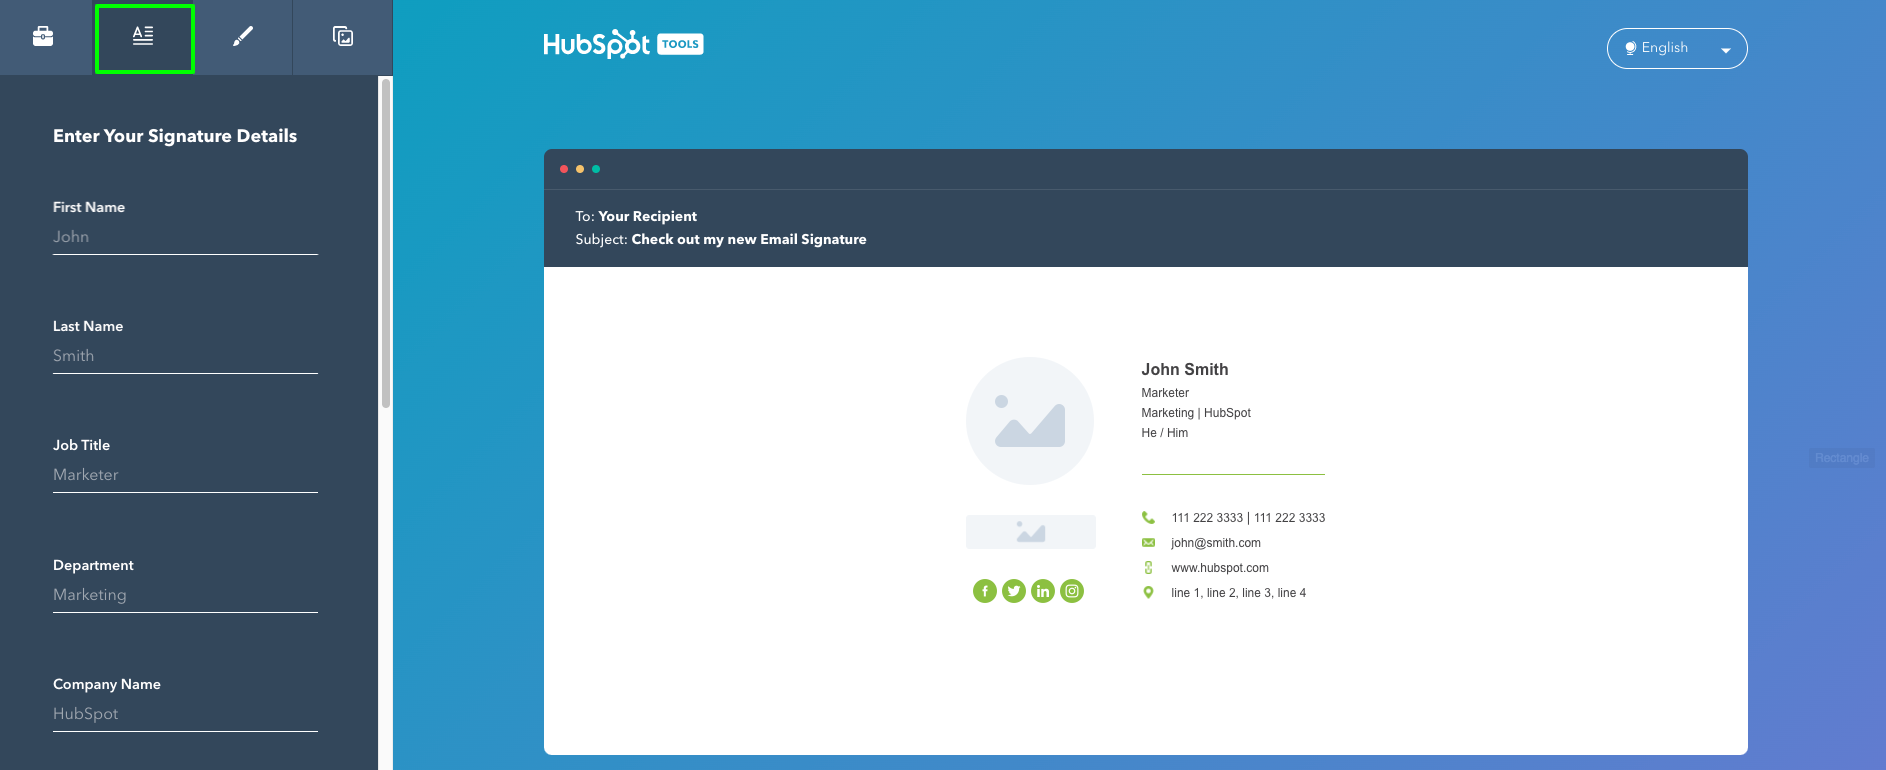
You can also supply additional contact details if you’d like. These can include a phone number, address, website or links to any relevant social media accounts — such as your LinkedIn page.
3. Upload Your Company Logo
After the contact details are in, the HubSpot signature maker will prompt you to upload your company’s logo. To do this, simply copy and paste the link to the photo in the designated box.

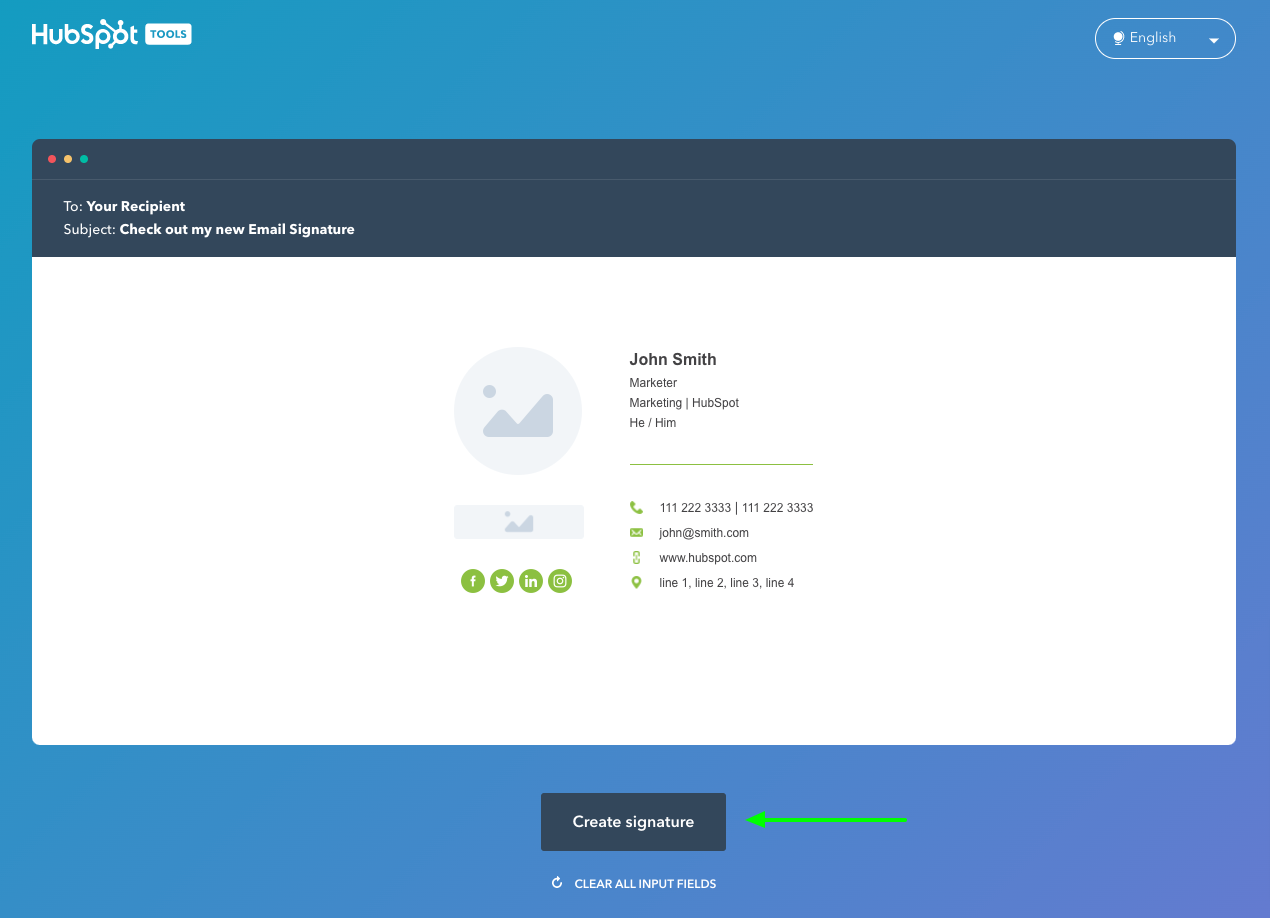
4. Generate Your Email Signature
Once your email signature is ready to go, click the “Create signature” button listed below the template. Now all that’s left to do is attach it to your email. These steps can vary based on which email provider you use — like Gmail, Apple Mail, Outlook or Yahoo. Most email systems will have an option within their settings to add a customized email signature. Once there, you’ll paste the email signature into the correct box, save your changes, and voilà! You’re ready to send emails with a crisp and professional signature.
Looking For More Email Marketing Tips?
Creating a personalized signature brings plenty of benefits — but email signature marketing is just one part of a much larger picture. Whether you want a strategic guide to emoji usage, ideas for witty sign-offs or tactics for optimizing your email marketing campaign, we’ve got you covered.
Sign up for our newsletter to get more digital marketing tips and tricks delivered to your inbox.
Editor’s Note: Updated March 2023.